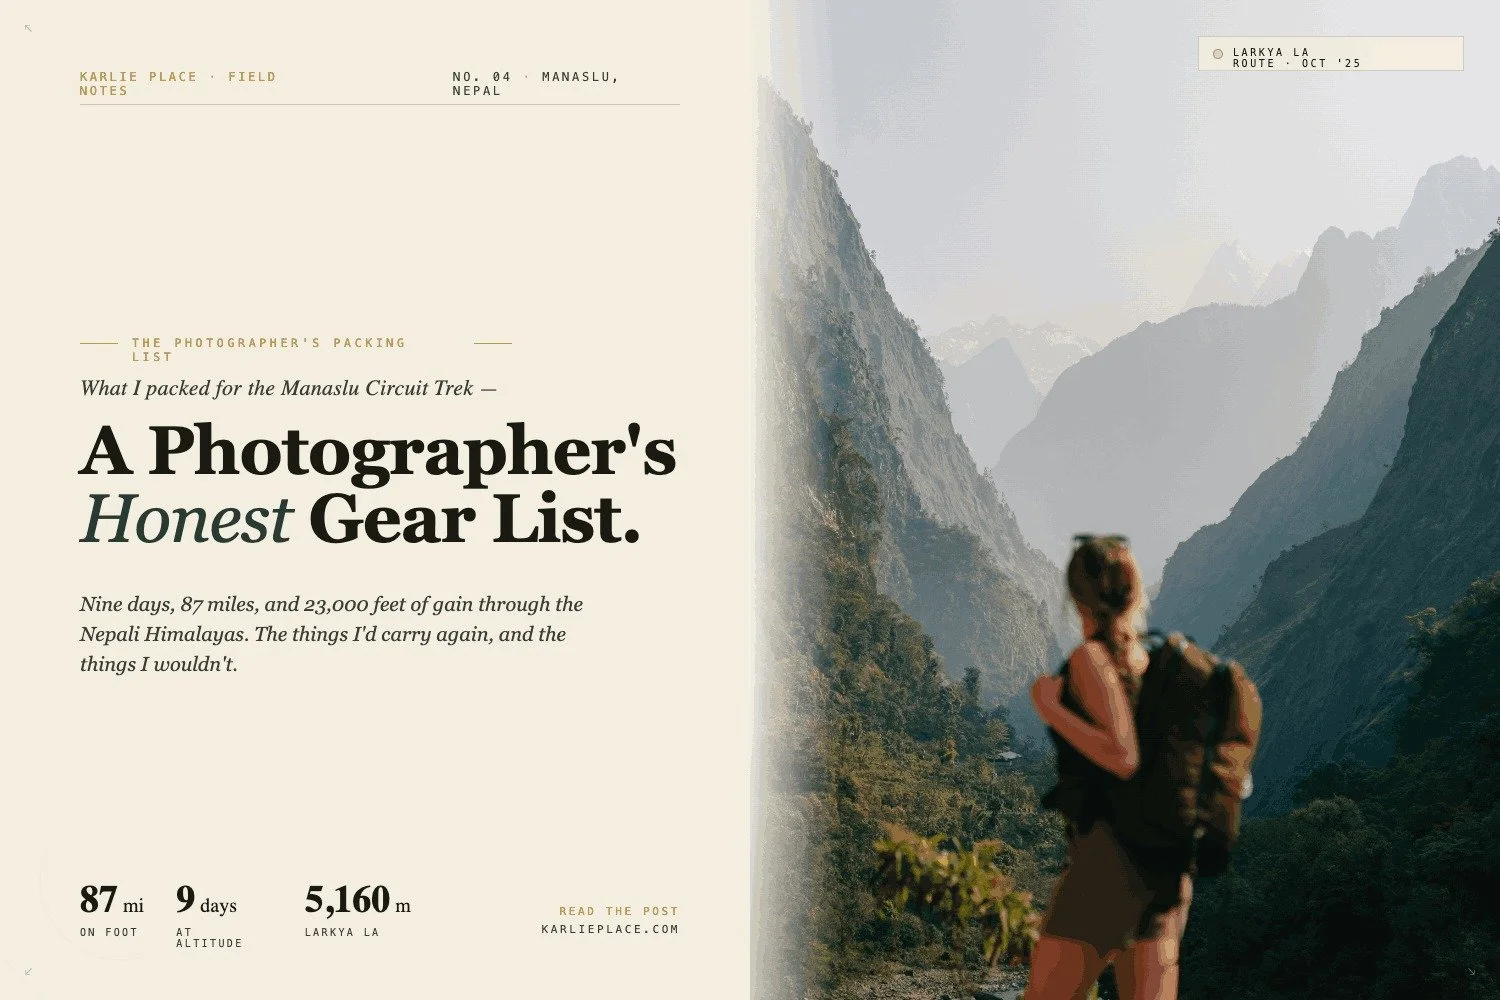
What I Packed for the Manaslu Circuit Trek: A Photographer's Honest Gear List
By Karlie Place
This is the honest packing list from a working travel photographer who just spent ten days hiking the Manaslu Circuit Trek in Nepal. Not a brochure list. Not a "here's everything you could possibly need" list. The actual gear I packed, with quantities, what I'd skip if I did it again, and the small things nobody mentions until you're standing in a teahouse at 4,400 meters wishing you had them.
The full day-by-day version of this trip lives in my Manaslu Circuit Trek Day-by-Day Itinerary. This post is just the gear.
⭐ FREE PRINTABLE PACKING LIST PDF
If you'd rather skip the reading and just get the tickable checklist, I made a printable PDF version of everything below, with the exact quantities I packed and which items I'd never go without. Get the free printable packing list here.
You'll also get my Sunday newsletter, We're Going Places, with behind-the-scenes from my next trips. Unsubscribe anytime.
This post contains affiliate links. Booking through my links supports this blog at no extra cost to you.
The Two Bags
Most operators will tell you to bring one big duffel that your porter carries and one daypack that you carry. They are right. The split matters.
The Porter Bag
This is the bag Das carried for me. It's a roomy 45L backpack with comfortable straps, holds everything you don't need during the day, and is durable enough that it survived being strapped together with a second bag, getting tossed onto bus roofs, dragged through the rain, and used as a footrest at lunch stops. Your porter is going to absolutely brutalize this bag for ten days. Buy something built for it.
The Camera Bag (Yours to Carry)
This is the bag that's on your back every minute of every hiking day. It needs to fit your camera body, your lenses, your water, your tripod, your snacks, your rain shell, and whatever layers you might shed during the day. It also needs to be comfortable enough to wear for 8 to 10 hours of hiking with elevation gain.
This is the exact camera backpack I used. I cannot say enough about how it carried. Padded, well-organized internally, designed with a photographer in mind, secure enough that I trusted it with my camera body for a week and a half of mountain travel. If you're spending money anywhere on this trip, spend it on the bag that carries everything you can't replace.
The Pack Cover (Don't Forget This)
You need a waterproof rain cover for your backpack. It's a tiny stretchy nylon thing that lives in a stuff sack until it rains, then slips over your whole bag like a shower cap. There are three or four days of this trek where it rains hard enough that nothing in your daypack will stay dry without one. Mine packed down to the size of a tennis ball. Worth every gram.
Packing Cubes (Yes, Really)
You'll see other Manaslu packing lists telling you to skip packing cubes and use dry bags instead. I disagree. My packing cubes from Amazon were one of the most convenient things in my bag. I had one for tops, one for bottoms, one for base layers, and one for the random small stuff. Every morning I knew exactly where everything was. I could pull out the day's outfit without unpacking my entire duffel onto a teahouse bed. A proper pack cover and a duffel with a water-resistant shell will handle the waterproofing for you. No issues.
The Camera Kit (For Photographers)
This is the section nobody else writes well, because most Manaslu packing lists are written by guides or general trekkers who tell you to leave the heavy camera at home. I don't agree. If you're a photographer, the entire point of this trek is to come home with images.
Camera Body and Lenses
I shot on a Sony A7 IV, with a Sony 24-70 G Master and a 14mm prime. The wide angle ended up being my favorite — the scale of these mountains demands a 14mm or 16mm. If you're packing one prime, make it a wide.
Quick story for context: I dropped my camera on day two and the LCD screen shattered. I shot the remaining eight days composing through the viewfinder, with no screen to confirm my shots. It worked out, but I would absolutely recommend bringing a backup body if you have access to one. There is no Sony repair service in Samagaon.
The full breakdown of my camera kit lives in this collection:
Note: this collection is my full owned camera kit, not the exact subset I brought on the trail. For the trek, I carried the A7IV body, the 14mm prime, the 24-70 G Master, my Capture Clip, a tripod, batteries, and SD cards. I left the rest at home.
The Battery Box That Saved Me
This is one of the smartest pieces of gear I packed and almost nobody talks about it. It's a small dual-charging case for Sony camera batteries — you drop two batteries into it, plug it into USB, and it charges both at the same time. The case itself also acts as a portable charger, so on the days when teahouse power was unreliable, I could top off my phone off the same brick that was charging my camera batteries. Two functions, one piece of gear. If you shoot Sony, get one of these before you fly.
Other Camera Notes
- Two extra SD cards. You don't want to be culling shots on a teahouse balcony at 4,000m.
- Three microfiber cloths. Dust in the lower valleys is no joke. I wiped my front element a hundred times.
The Capture Clip
I am an evangelist for the Peak Design Capture Clip. It is the best piece of camera gear I've ever owned for active travel. It mounts to your backpack strap, lets you draw your camera in seconds, and uses the same Arca-Swiss-compatible plate as your tripod, so swapping between handheld and tripod takes no time. One note: if your clip is older than a couple of years and you use it heavily, consider replacing it before a big trip. Mechanical locks wear out.
Tripod
This is the travel tripod I brought. Lightweight, packs small, sturdy enough to hold a full-frame body with a 14mm in moderate wind. I used it most for sunrise and sunset shoots, and for moonlight long exposures at 3 a.m. on the morning of Larkya La Pass. If you're hiking through the Himalayas, you will want a tripod.
A Note on Drones
The Manaslu Circuit is a restricted area. Flying a drone here without a permit is illegal, and the permit process is expensive and slow. The official Nepal drone permit costs around $1,850 USD. There are local permits available for around $500 USD, but they take 10+ days to process. Do not bring a drone to this trek if you don't have the permit in hand. The fines and confiscation aren't worth the shot.
The Layering System
This trek takes you from sweaty 1,000-meter river valleys to a 5,106-meter snowy mountain pass. You are going to need layers, and you are going to need to be able to swap them quickly. Here's the system that worked for me, with quantities.
Base Layers
I packed three long-sleeve merino tops and two pairs of merino base layer pants. My Helly Hansen base layer top and these Helly Hansen base layer pants are my favorites of what I packed, and from day four onward I basically lived in this combo. Merino blend, moisture-wicking, doesn't stink even when you wear them for days, and warm enough to be your sleep layer at altitude.
This is the gear category I cannot compromise on. Cheap base layers will hold sweat, get cold, and make you miserable. Buy real merino-blend base layers and wear them the whole trip. Three tops and two bottoms is the right number for ten days of hiking, with one set in the wash, one drying, and one on your body.
Mid Layers
I packed two fleece pullovers in slightly different weights. The reason for two: one is always damp from sweat or rain, and at altitude nothing dries quickly. By the time I got above 3,500 meters, the fleece was on me almost constantly. Day one I was hiking in a tank top and sweating; day seven I was in three layers and shivering. The Himalayas don't care.
I also packed two short-sleeve tops for the lower-elevation hot days and for sleeping in the warmer villages, plus two pairs of hiking pants (more on those below).
The Heavy Down (Bring Two)
For the cold nights at Dharamsala and the 3 a.m. start to Larkya La, I had my warmest down jacket, the same one I wore in Iceland, plus a second lighter packable down. Do not skimp on your warmest layer. I slept in both at Dharamsala and started the pass in both before stripping down on the descent.
Two down jackets sounds excessive, but it really isn't. The packable one is your daily insulation layer. The heavyweight one is your "I cannot get cold or I'm in trouble" layer for the pass and the highest villages.
Rain Jacket
Get a real rain jacket. This Arc'teryx rain jacket was the single best gear purchase of the trip. It has a tiny brimmed hood that keeps rain out of your eyes, packs down small, and is light enough that I never resented carrying it. I wore it through every wet day of the trek and never once felt damp underneath.
The funny part: it's not long enough to cover my pants or backpack. So I layered a $1.50 transparent plastic poncho from a roadside bodega over the top of my Arc'teryx. Best gear stack of my life. If you want to do this more elegantly, bring proper waterproof rain pants. I didn't, and the poncho hack worked.
Hat, Mittens, Gloves, Sunglasses, Neck Gaiter
Five small pieces, five big jobs:
- A warm beanie for cold mornings, evenings, and the 3 a.m. start to Larkya La. Mine went on my head every day at altitude and slept on my pillow at night.
- A baseball cap or brimmed sun hat for the lower-altitude hot days and to keep sun off your face. I only brought a beanie and wished I'd had both.
- These heavy insulated mittens were lifesavers on the 3 a.m. start to the pass. Mittens are warmer than gloves at altitude, bring real ones, not knitted ones.
- A pair of thin liner gloves, separately from the mittens. These were perfect for the in-between temperatures — mornings before the cold really set in, evenings in the teahouses, descending below 3,500m. Full mittens are overkill 80% of the time. Liner gloves cover that 80%.
- UV-blocking sunglasses are non-negotiable for the snow descent off Larkya La. Sun reflects off snow back up at your face and your eyes. Snow blindness is real, especially at altitude.
- A merino neck gaiter, the tube kind that you can pull up over your face when the wind picks up, down around your neck when you're hot, or wear as a headband. One of the most versatile pieces in my kit.
Footwear
The Boots
I wore Keen Targhee Apex Mid hiking boots for the entire trek. They were waterproof, durable, gripped well on rock and mud and snow, and looked basically untouched at the end of ten days. I'd recommend them.
The one mistake I made: I sized them too small. I got two black toenails on the descents because my toes were jamming into the front of the boot on every downhill. If you're buying new hiking boots for this trek, size up half a size. Your feet will swell at altitude. The descents are long, steep, and often loose underfoot. Give your toes room.
Hiking Socks (Bring Four)
Cotton socks will absolutely destroy you on a multi-day trek. I wore moisture-wicking hiking socks daily and never had a single sock-related problem. Pack four pairs. You'll be rotating between clean, drying, and on-your-feet, and at altitude clean dry socks become a small daily luxury.
Sleeping Socks
This is the small thing that nobody mentions and that changed my life. Bring a dedicated pair or two of clean wool socks just for sleeping. Your hiking socks are sweaty and cold and you don't want them in your sleeping bag. These wool sleeping socks are the clean dry sleeping-only pair I packed and put on every night the moment I got to my room. Worth their weight a hundred times over.
Flip Flops (That Double as Shower Shoes)
I packed flip flops. The moment I got to a teahouse each night, the boots came off and the flip flops went on. Even in cold weather, you do not want to keep your hiking boots on inside the teahouse. Make sure the flip flops you bring are something you'd be okay wearing into a teahouse shower stall. Some of those floors are wet, muddy, shared with squat toilets, and full of yak grit. Whatever you bring needs to do double duty as a camp shoe and a shower shoe. When you finally finish the trek and sit in a tea hut at Dharapani after 87 miles, putting on flip flops is a religious experience.
Sleep System
Every teahouse on the Manaslu Circuit provides a raised bed, a thin mattress, a pillow, and a heavy down comforter. The bedding always seemed clean, and I never found a single bug in ten days, but I am not a brave woman about anonymous bedding. Here's what I added.
Sleeping Bag Liner
This thermal sleeping bag liner is one of the most important items in my pack and will probably go on every backpacking trip I take for the rest of my life. I slept in it every single night of the trek, even on the warm nights when I didn't need the actual sleeping bag.
It's a clean private cocoon you can trust, it adds significant warmth at altitude, and on hot lower-valley nights it's all you need. Buy this.
Sleeping Bag
The teahouses provide blankets, but you'll want your own sleeping bag rated to at least -10°C (14°F) for the higher villages. I used a NEMO Disco 15 down sleeping bag and it was warm enough for every night of the trek including Dharamsala. Bonus points for getting one that stuffs down small — you'll be hauling it for 87 miles.
The Sleep Kit (Huge)
This was one of the most important small additions to my pack. I built a little zip pouch with everything I needed to actually sleep at altitude, and I used it every single night:
- An eye mask. Teahouse rooms have thin curtains, and a 5:30 a.m. sunrise will wake you up whether you wanted it to or not.
- Loop earplugs in their little case. Worth the splurge, in my opinion. The case matters because you will lose them otherwise. At Dharamsala, where you're sharing a hut floor with four strangers, these are the difference between sleeping and lying awake counting other people's breaths.
- Charger for your phone and AirPods. Most altitude nights you'll want to fall asleep to a podcast.
- Any sleep meds you use at home. Talk to your doctor before you fly about whether anything you normally take interacts with Diamox.
Pillow Hack
The pillows in teahouses are fine, but I wrapped my own fleece around mine every night to give it a clean barrier. You could also bring a small pillowcase. Small thing, real difference.
Water (My Approach Was Different)
Most packing lists for this trek will tell you to bring water purification tablets and use them religiously, drawing water from village taps and rivers. That is a totally safe and well-established approach, and a lot of people do it. It's also what my guides preferred and gently kept suggesting throughout the trek.
I made a different call. I bought new sealed bottles of water along the entire route. Jiwan and Das would stop in villages once or twice a day and pick up a few bottles for me, sometimes carrying them in the porter bag and handing them over when I needed a refill, sometimes I'd carry them in my own pack. They told me water gets "really expensive" higher up the trail, and at first that worried me, but when we actually did the math at the upper villages it worked out to about $4 USD a bottle near the pass. For me, that was completely fine. I was happy to pay for the peace of mind.
I drank straight from the bottles. Paige, my hiking partner, used the bottles to refill her hydration bladder, which is another good approach if you prefer drinking from a tube while you walk.
So my recommendation is: pack water purification tablets as a backup, but understand that you can almost certainly buy bottled water along the entire trail. Your guides will tell you what's actually best for your specific route.
The Toiletry Kit (Stripped Down)
I really love my Mila toiletry organizer for keeping a tight kit organized. For the trek, I downsized hard. Here's exactly what I brought.
- Magnetic refillable travel bottles for shampoo and conditioner, lightweight, leak-proof, easy to refill.
- Everist scent-free body wash balm, solid bar, no liquid weight, multipurpose.
- Deodorizing body wipes from Amazon, I buy these in bulk. On the nights when there was no shower (Samdo and Dharamsala), these were the difference between feeling human and feeling feral. Bring more than you think you need.
- A microfiber quick-dry travel towel, in a stuff sack. Teahouses don't provide towels. A regular bath towel is too heavy and too slow to dry. The microfiber kind wrings out, dries overnight on a hook, and packs back into a tiny pouch.
- Toothbrush, full-size toothpaste, deodorant.
- One good face cream that doubled as hand cream, high altitude air will dehydrate your skin in ways you've never experienced.
- Korean SPF, milky, creamy, perfect at high altitude. Sun reflects off snow and gives you a "sunburn mustache" if you don't apply religiously. Do not be one of those TikToks.
- Bronzer, mascara, one makeup brush, for vlog days when I had energy.
- Blistex medicated lip balm, old-school, undefeated. Your lips will crack at altitude.
- Two full rolls of toilet paper. I packed two thinking it was overkill. I came home having used almost two complete rolls. Teahouse bathrooms often have none, and the ones that do have very limited supply. Bring your own. Two is the right number.
Real Talk About Teahouse Showers
Teahouse showers are an experience. Some are heated by propane heaters with literal flames inside the shower stall. Some are unheated. Some don't exist at all (Samdo and Dharamsala had no showers). Plan accordingly:
- Bring your own towel (the quick-dry kind from the list above).
- Bring a small shower tote with a hook. There is nowhere clean to set anything down.
- Bring everything in and take everything out. The floors are wet, often there's a squat toilet on the same floor of the same room, and you don't want any of your things in extended contact with that environment.
The Stuff Nobody Talks About
The 250 NPR Nail Clipper
On day two of the trek, my toenails were starting to suffer. Jiwan walked into a village shop and bought me a 250-rupee nail clipper, about $2 USD. It was the most important $2 of the entire trip. I cannot guarantee your guide will buy you a nail clipper. Pack one.
Dr. Scholl's Blister Patches
By day three, I had blisters. These Dr. Scholl's blister patches are not glamorous and not sponsored, and they saved my feet for the rest of the trek. Pack a generous supply.
Carabiners (× 3)
Three small carabiners will earn their space in your pack. Here's why: at a certain altitude, your sweaty hiking clothes stop drying. The air is too thin and too cold. Hanging a damp shirt overnight inside a teahouse will not work. So you clip your wet socks, your sports bra, your damp shirt to the outside of your pack the next day and let them air-dry as you walk. The sun and movement do what an indoor clothesline can't.
Portable Charger (× 2)
Most teahouses have power outlets, but they're inconsistent. The two highest-altitude shelters, Dharamsala and Bimthang, have either no power or unreliable power. A portable charger is non-negotiable, and you really want two of them. One for your phone and AirPods, one as a backup. (My Sony battery box from earlier doubles as a third in a pinch.)
Headlamp
You will need a real headlamp for the 3 a.m. start to Larkya La Pass. This is the one I packed. Bright, comfortable, easy to switch modes with mittens on. Test it before you go and bring spare batteries.
Crampons / Microspikes
These crampons live in my pack for any high-altitude trek now. The descent off Larkya La in May had patchy snow and ice. I should have put them on at the summit but didn't, slipped, and took out my guide on the way down. Put them on at the top of the pass. They're light, they slip on over your boots, and they will save you from twisting an ankle on iced-over rock.
Bug Spray and Anti-Itch Cream
The first three days of this trek are in lower-altitude river valleys, which means mosquitos and other biting insects. A small tube of bug spray goes a long way for those first three days. Pack a small tube of anti-itch cream alongside it for the bites that get through. Once you climb above about 2,500m the bugs disappear.
Diamox (Acetazolamide)
I'm not a doctor. Talk to yours. But: I got a Diamox prescription via Teladoc before the trip. The doctor reviewed my altitude profile and prescribed acetazolamide 125mg twice daily. I picked it up same-day at Walgreens. You cannot take it if you're pregnant or have liver issues. I started taking it in Samdo and stopped after Larkya La. Diamox prevents acute mountain sickness, it does not make 4,500 meters feel like sea level. You will still feel the altitude. Diamox just stops you from getting seriously sick from it.
Snacks
Your appetite will die at altitude. Bring snacks you'll actually eat when nothing sounds appealing — Snickers bars, trail mix, dried fruit, gummy candies. I'd also pack salt tablets and electrolyte mixes.
Entertainment for the Boredom Hours
Some days are short and you'll arrive at your village by 11 a.m. with nothing to do. Pre-download way more podcasts than you think you'll need. I burned through everything I had by day four. I also wish I'd packed a Kindle, a small journal, or a deck of cards.
What I Brought But Didn't Need
A short list of things other packing lists will tell you to bring that I genuinely didn't use:
- Hiking poles. I brought a pair and didn't use them once. I regretted carrying them. That said, I was the exception — most other trekkers I saw on the trail used poles, especially on the steep descents. This is 100% personal preference. If you're someone who likes poles, bring them. If you're not sure, try them on a long training hike before you fly and see how you feel.
- Zip-off convertible hiking pants. A lot of packing lists swear by these. I'd never wear them — I much prefer real hiking pants that feel like actual clothes. I wore my Joah Brown Barrel Pants for most of the trek and they were perfect: comfortable, breathable, looked normal. Pack whatever cut of hiking pants you actually like wearing.
What I Wish I'd Packed (For After the Trek)
This is the section that doesn't show up on other Manaslu packing lists, because most people skip it: you will spend a day in Kathmandu after the trek, and possibly a day on either end of your flights. Pack one full extra outfit for Kathmandu and one clean outfit for the flight home, and leave them at your hotel while you trek.
- A flowy linen outfit for the Kathmandu day. After ten days in technical hiking clothes, the last thing you want is to walk around Thamel and the temples in your sweaty merino base layers. I genuinely wish I'd left a soft linen set in the safe at the hotel. Future me would have hugged past me for it.
- A clean airport outfit for the flight home. 36 hours of travel back to the US in your trek clothes is rough. A clean tee, soft pants, and clean underwear waiting for you at the hotel makes that long-haul human again.
What I Wish I'd Brought (On the Trail)
- A second camera body. If I'd had a backup, the broken LCD wouldn't have been a near-disaster.
- A Kindle or a paperback book. See above.
- A mini watercolor set or a small journal. For the long quiet afternoons in Samdo and Bimthang.
- A deck of cards. The night I taught my trail friends to play Kemps in Bimthang was one of the best of the whole trip, and I had to mime out the rules because nobody had a deck.
What to Leave at Home
- Your laptop. I left my MacBook in the safe at the hotel in Kathmandu. I'm not humping a 16-inch laptop for 87 miles.
- Jeans. Any jeans, period. I didn't bring a single pair on this entire trip, and I never once wished I had. There is no scenario on this trek (or in Kathmandu before or after) where jeans are the right call. Hiking pants, base layers, and a linen set are all you need.
- A heavy book. Should have brought a Kindle, definitely shouldn't have brought a hardcover.
- "Just in case" outfit options. There is no scenario in the next ten days on the trail where you will need a cute outfit. Save the weight.
The Full Collection
Here's everything I packed for the Manaslu Circuit Trek in one place:
⭐ DON'T LEAVE WITHOUT THE PRINTABLE LIST
If you want the tickable checklist version of everything above (with exact quantities, what to never go without, and a clean page you can actually pack with), download the free printable Manaslu Packing List PDF here.
You'll also be added to my Sunday newsletter, We're Going Places, where I share what I'm working on next.
The Real Lesson
You can do all the preparing you want, the fanciest boots, the best rain jacket, the multiple sleeping bag liners, the obsessive Strava research. Meanwhile, your porter is wearing Air Force Ones and carrying five times your weight without a single complaint.
The gear matters. The gear can fail. The gear is also, ultimately, not what gets you across a 5,106-meter pass. What gets you there is the willingness to keep moving when your toenails are bruised, your friend got helicoptered off the mountain, and the fog has been so thick for four days you're starting to forget what mountains look like.
Pack well. Then trust yourself.
Want the Full Story of the Trek?
The day-by-day version of this trip lives in my Manaslu Circuit Trek Day-by-Day Itinerary.
And if you're considering booking this trek, my full booking and guide-selection guide is in How to Book the Manaslu Circuit Trek + What to Look for in a Guide Company.
Book the Trek
I trekked with Ecuatraveling and cannot recommend them more highly. Ask for Jiwan and Das specifically, and tell them Karlie sent you. They are the entire experience.
Connect with me on Instagram · TikTok · YouTube · Linktree
This post contains affiliate links. Booking through my links supports this blog at no extra cost to you.